One of my 43 things is to make a new recipe every week for six months. I chose six months because honestly I didn't want to commit to a year, but I may extend it if I make it that far.
This week's recipe was Gorditas. This roughly translates to "little fat ones" and you'll see what I mean when we're finished...
I found a website when searching for a Tres Leches Cake recipe; she has JUST what I was looking for. Though my boyfriend is not Mexican, he's from El Salvador, many of the recipes on her blog are part of his culture, too. These in particular are not, but they're yummy.
I roughly followed her recipe:
here.
I used:
2lbs Sirloin Tip Steak
Oil
Onion
Salt
Sazon (coriander and annatto seasoning, see photo)
Garlic
Cilantro
Maseca
Black Beans
Lettuce
Tomato
Mozzerella cheese
If you want exact measurements, see the link above, I just used what "felt right" or what we had.
Forewarning, I haven't really watched the video she has--I skimmed through it, so these may be totally different and my method could be completely opposite, but they taste great.
I started out the wrong way with this and next time I make them (there will be many next times) I'm going to mix all of the steak seasonings together with the steak before putting them in the pan.
First, I sauteed the onions.

Then I cut up the steak to make it easier to cook-up, and later shred. I think if I would have made them much smaller it would have been better in the first place but it really doesn't matter I don't think.


Then I added this to the pan.

Then I added the garlic.

Next the cilantro got diced up and mixed in as well.


Then I added the Sazon. Most of our local grocery stores carry this but I'm willing to bet any Mexican grocery has this exact brand on their shelves.


It's looking like raw meat with some seasonings, but trust me, it gets much better...
I let that cook, stirring often to get all of the meat cooked through, and began working on the "tortilla" part of our Gorditas. Maseca is also found at all of our local grocery stores and probably at every Mexican grocery in America.

I mixed it with water, how much is always different. You want it moist, but not so moist that it's watery. It should just lightly stick when you handle it, and I mean very lightly.


I worked the mix into a large disk, about one inch thick by 3-4 inches round.


Then, because I didn't have enough oil to use a skillet, I used a medium-size pan to fry the tortillas in. I have a hard time calling them tortillas because they're so thick, but I suppose that's what they are...

After a while I gave it a flip.

This is where I realize her recipe called for baking soda. Oops, too late for these. My tortillas didn't quite get cooked through and I'm wondering if this leavening agent would have helped, but they were still delicious in my opinion.
I put the tortillas on a rack to dry/cool without getting mushy from the extra grease.
Then I got started with the beans. I used some for a filling and some for a side-dish. I wanted something easy after making this new recipe. Rice would be another natural side for these, my "sister-in-law" (we're not married so there's no law about it) makes her rice with Sazon, carrots, green peppers, onions, and tomatoes...at least that's the recipe she's taught me so far. It's a little more labor intensive than opening a can and turning the burner on.
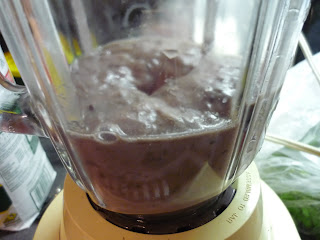
To make the "filling beans" I'm going to put them in the blender, this is also how I make re-fried beans.

Our little secret: these went into the microwave to heat them up. I wasn't about to dirty another pan just for a few servings.
The rest of the can went into a pan of it's own though, to be served as a side.

Then I got to preparing the rest of the fillings:
I diced a tomato, but neglected to take pictures...I'm pretty sure everyone knows what that looks like.
Shredding the lettuce:

Slicing the onion:

And shredding the cheese. I will never skin my knuckles again, thanks to mom's cheese grater.
Just put a block of cheese inside:

And turn the handle:

And you've got quick, blood-free grated cheese.
A little sales pitch here: I don't know if Pampered Chef still sells these, but if they do and you don't have one, you need one. It's definitely on the "Entertaining" level of kitchen necessities, but if you're looking to spoil yourself...I know a consultant.
So now for some finishing touches.
I sliced my tortillas in the center, but not all the way through (everyone broke theirs apart to fill it anyway...so really do what you like) so that they can be filled.

Then I shredded up the cooled meat some more, and then brought it back up to yummy temperature.

Then, the troops were called to dinner and everyone made their own, buffet style.
Here's mine, it's really more delicious than it looks, I promise. Next time I'll work a little harder on my presentation, tonight I was hun-gry.

These Gorditas are so fat they don't hold their filling. Oh and my silly self forgot the sour cream.
If you don't want to make them yourself, stop by your neighborhood taco-truck, that's where I first heard of them. I don't know if all of them feature this dish but the one near my boyfriend's house does. They're much better made from scratch though, I bet...


